Custom fields are used to enter recipient data. They can be thought of as columns, basically the same ones you know from Excel. Example:

Email, Phone, First Name, Last Name, and Gender are all fields, that are available in Boldem by default for all recipients. The Subscription, Subscription discount and VIP Status are newly added fields that can take on different values. For example, the Subscription field can have the value Yes or No, and you can use this field to evaluate whether the recipient is subscribed to the newsletter.
The VIP status field is used to store the type of VIP status, i.e. the importance of the customer. According to that, you can send them specialized newsletters, promo codes, and other targeted content.
The Subscription discount field holds the date and time of the customer’s discount receipt upon subscribing to the newsletter. Similarly to the other fields, it can be evaluated to determine, for example, whether the customer is already eligible for any other discount.
Creating a custom field
If you’re using the Shoptet or Upgates online stores and link them to Boldem, the process will replace all existing custom fields in Boldem with the custom fields from the linked platform during the first import. It’s important to keep this in mind before you begin creating new custom fields.
To add a new custom field, proceed with these steps:
- Go to Mailing lists, select the Custom fields tab, and click Create a custom field.
- A dialogue will appear to enter data for the new custom field.
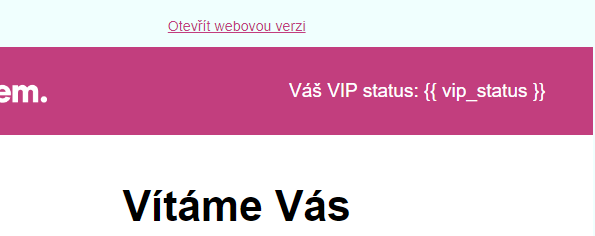
- In the required Identifier field , enter the name without spaces and diacritics. You can use underscores instead of spaces. E.g. vip_status. You’ll use the identifier as a variable within templates. In this case, the variable string would be {{ vip_status }}. It is therefore preferable to use shorter names for strings.
- In the required Descriptive name field, enter the name of the field the way you want it to appear in the exported file. For example, VIP status.
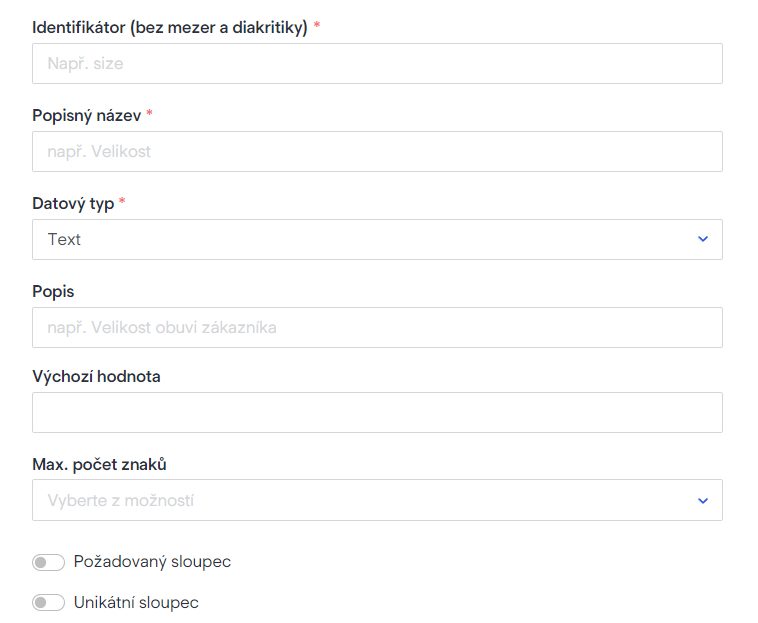
- The required field Data type allows you to select the type of the field, i.e. what values the field can have. The following options are available:
Text
You can enter any text in the field. Optional fields:
- Description – enter a description of the field for your reference.
- Max. number of characters – select the desired limit on the maximum text length.
- Default value – choose the desired default value for the field by entering the appropriate text.
Number
You can enter any numbers in the field. Optional fields:
- Description – enter a description of the field for your reference.
- Default value – enter the number you want the field to contain as default.
- Accuracy – enter the accuracy with which you want to store the number, i.e. how many decimal places the number should contain.
- Minimum value – specify the minimum value the number in the field should have.
- Maximum value – specify the maximum value the number in the field should have.
Yes/No
You can enter Yes or No values in the field. Optional fields:
- Description – enter a description of the field for your reference.
- Default value – choose the desired default value for the field.
Date and time
You have the option to enter the date and time in the field using the format you’ve configured in your account. The date and time format can be found in your account’s Settings/General section, under the Basic Settings/Date and Time Format tab. Optional fields:
- Description – enter a description of the field for your reference.
- Default value – enter the date and time you want the field to contain as default.
- Minimum value – specify the minimum value the number in the field should have.
- Maximum value – specify the maximum value the date and time in the field should have .
Date
You have the option to enter the date in the field using the format you’ve configured in your account. The date and time format can be found in your account’s Settings/General section, under the Basic Settings/Date and Time Format tab. Optional fields:
- Description – enter a description of the field for your reference.
- Default value – enter the date and time you want the field to contain as default.
- Minimum value – specify the minimum value the number in the field should have.
- Maximum value – specify the maximum value the number in the field should have.
Time
You have the option to enter the time in the field using the format you’ve configured in your account. The date and time format can be found in your account’s Settings/General section, under the Basic Settings/Date and Time Format tab. Optional fields:
- Description – enter a description of the field for your reference.
- Default value – enter the time you want the field to contain as default.
- Minimum value – specify the minimum value the time in the field should have.
- Maximum value – specify the maximum value the time in the field should have.
Options menu
You can enter values in the field Values. Required fields:
- Values – enter the values you want the field to contain by separating them with a semicolon, a comma, or a vertical bar. Example:
- Low;Medium;High
- Bronze,Silver,Gold
Optional fields:
- Description – enter a description of the field for your reference.
- Default value – enter the value you want the field to contain as default.
Other optional fields
- Required field – check the box if you wish to make this custom field mandatory.
- Unique field – check the box if you wish the field to contain only unique values.
After filling out the form, click Save.
Using a custom field
You can use custom fields either as variables in templates or in some automation blocks.
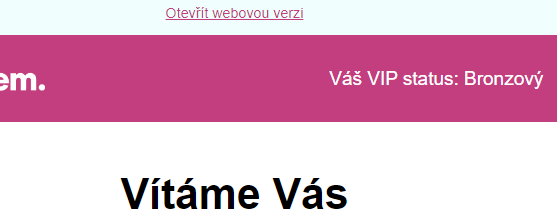
For example, the vip_status custom field can be used in a template as a variable {{ vip_status }}. Inserting the variable into any template will enable the recipient to see the actual value instead of just the string:
Will appear as:
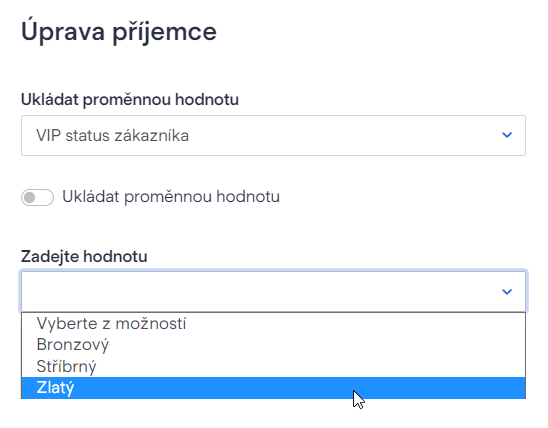
In terms of automation, a custom field can be used for ex. in the Edit recipient block, where each value (Bronze/Silver/Gold) is offered: